Inspiration can come from anywhere.
When I saw this big, red, luscious orb, I knew exactly what I would do...make a tomato pie.
 |
| I bought 3 very large tomatoes but only needed two...this is the unused one. |
A month or so ago, while I was reading another blogger's post, I was intrigued by the recipe for a tomato pie. Now, I've made many a fruit pie, and lots of quiches, but never a tomato pie. I felt sure I would like it right from the get-go.
As fate would have it, I tried but failed at finding the blogger who posted the recipe. So, I turned to others for help. Most of the recipes were similar, and very easy to put together. And, I'm not one to bother following a recipe...I often just throw things together and hope for the best.
It went something like this:
Made pie dough and pre-baked it for 20 minutes.
Added chopped fresh basil, salt, and pepper to Ricotta cheese in a bowl.
Mixed shredded Parmesan cheese with mayo in a second bowl.
After pie crust cooled,
put Ricotta in the bottom of the crust.
Layered large chunks of seeded and drained tomatoes on top of the Ricotta.
Sprinkled tomatoes with salt and pepper, and onion powder.
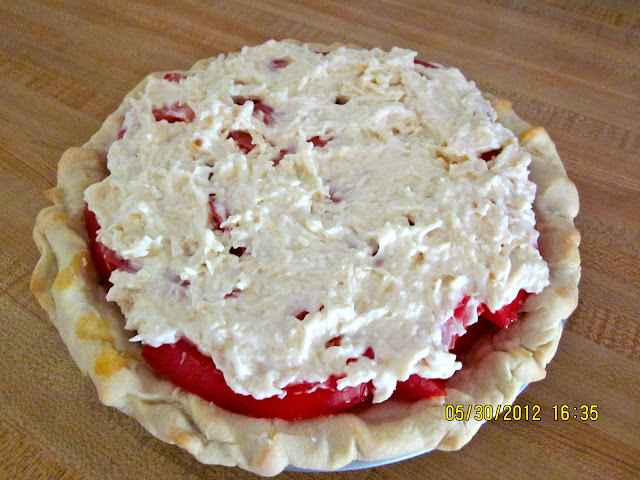
Spread the mayo /cheese mixture on top of the tomatoes.
Baked the pie for 55 minutes at 350˚
As the pie cooled some liquid formed in the bottom, I just poured it off.
This pie is very fresh tasting. It can be reheated for a few seconds in the microwave or oven, if you want it warm the next day. It's also good cold. It tastes much like a quiche, but I think it's not as heavy because there aren't any eggs or cream in it.
 |
| Pie before baking. |
 |
| Pie after baking. The green bits on top are a few small basil leaves. |
 |
| The first slice after the pie cooled for awhile. |
 |
| My dinner the following day. |
 |
| Still ever so pretty to behold and ever so yummy to eat. The salad greens all come from the small Earth Boxes on my deck. |
This tomato pie is my variation on it. You can leave out the Ricotta, you can use a different kind of cheese, you can add whatever you want to make it your own...Have Fun!
Mem
No comments:
Post a Comment